Soldiercrab SoM [TLQ-SOLDIERCRAB]
An embeddable FPGA SoM designed for high-speed audio and USB applications. This was designed as the brain of TLQ-MODULE, although it is also available separately and can be used in your own projects.

Use Cases
- Another / spare SoM for
TLQ-MODULE: You can swap out the Soldiercrab in your Tiliqua by removing a single screw. This could be interesting for future upgrades, or an interesting way of carrying around more bitstreams by e.g. storing 8 bitstreams on one SoM and 8 bitstreams on a different one.
- Another / spare SoM for
- FPGA SoM for your own project:
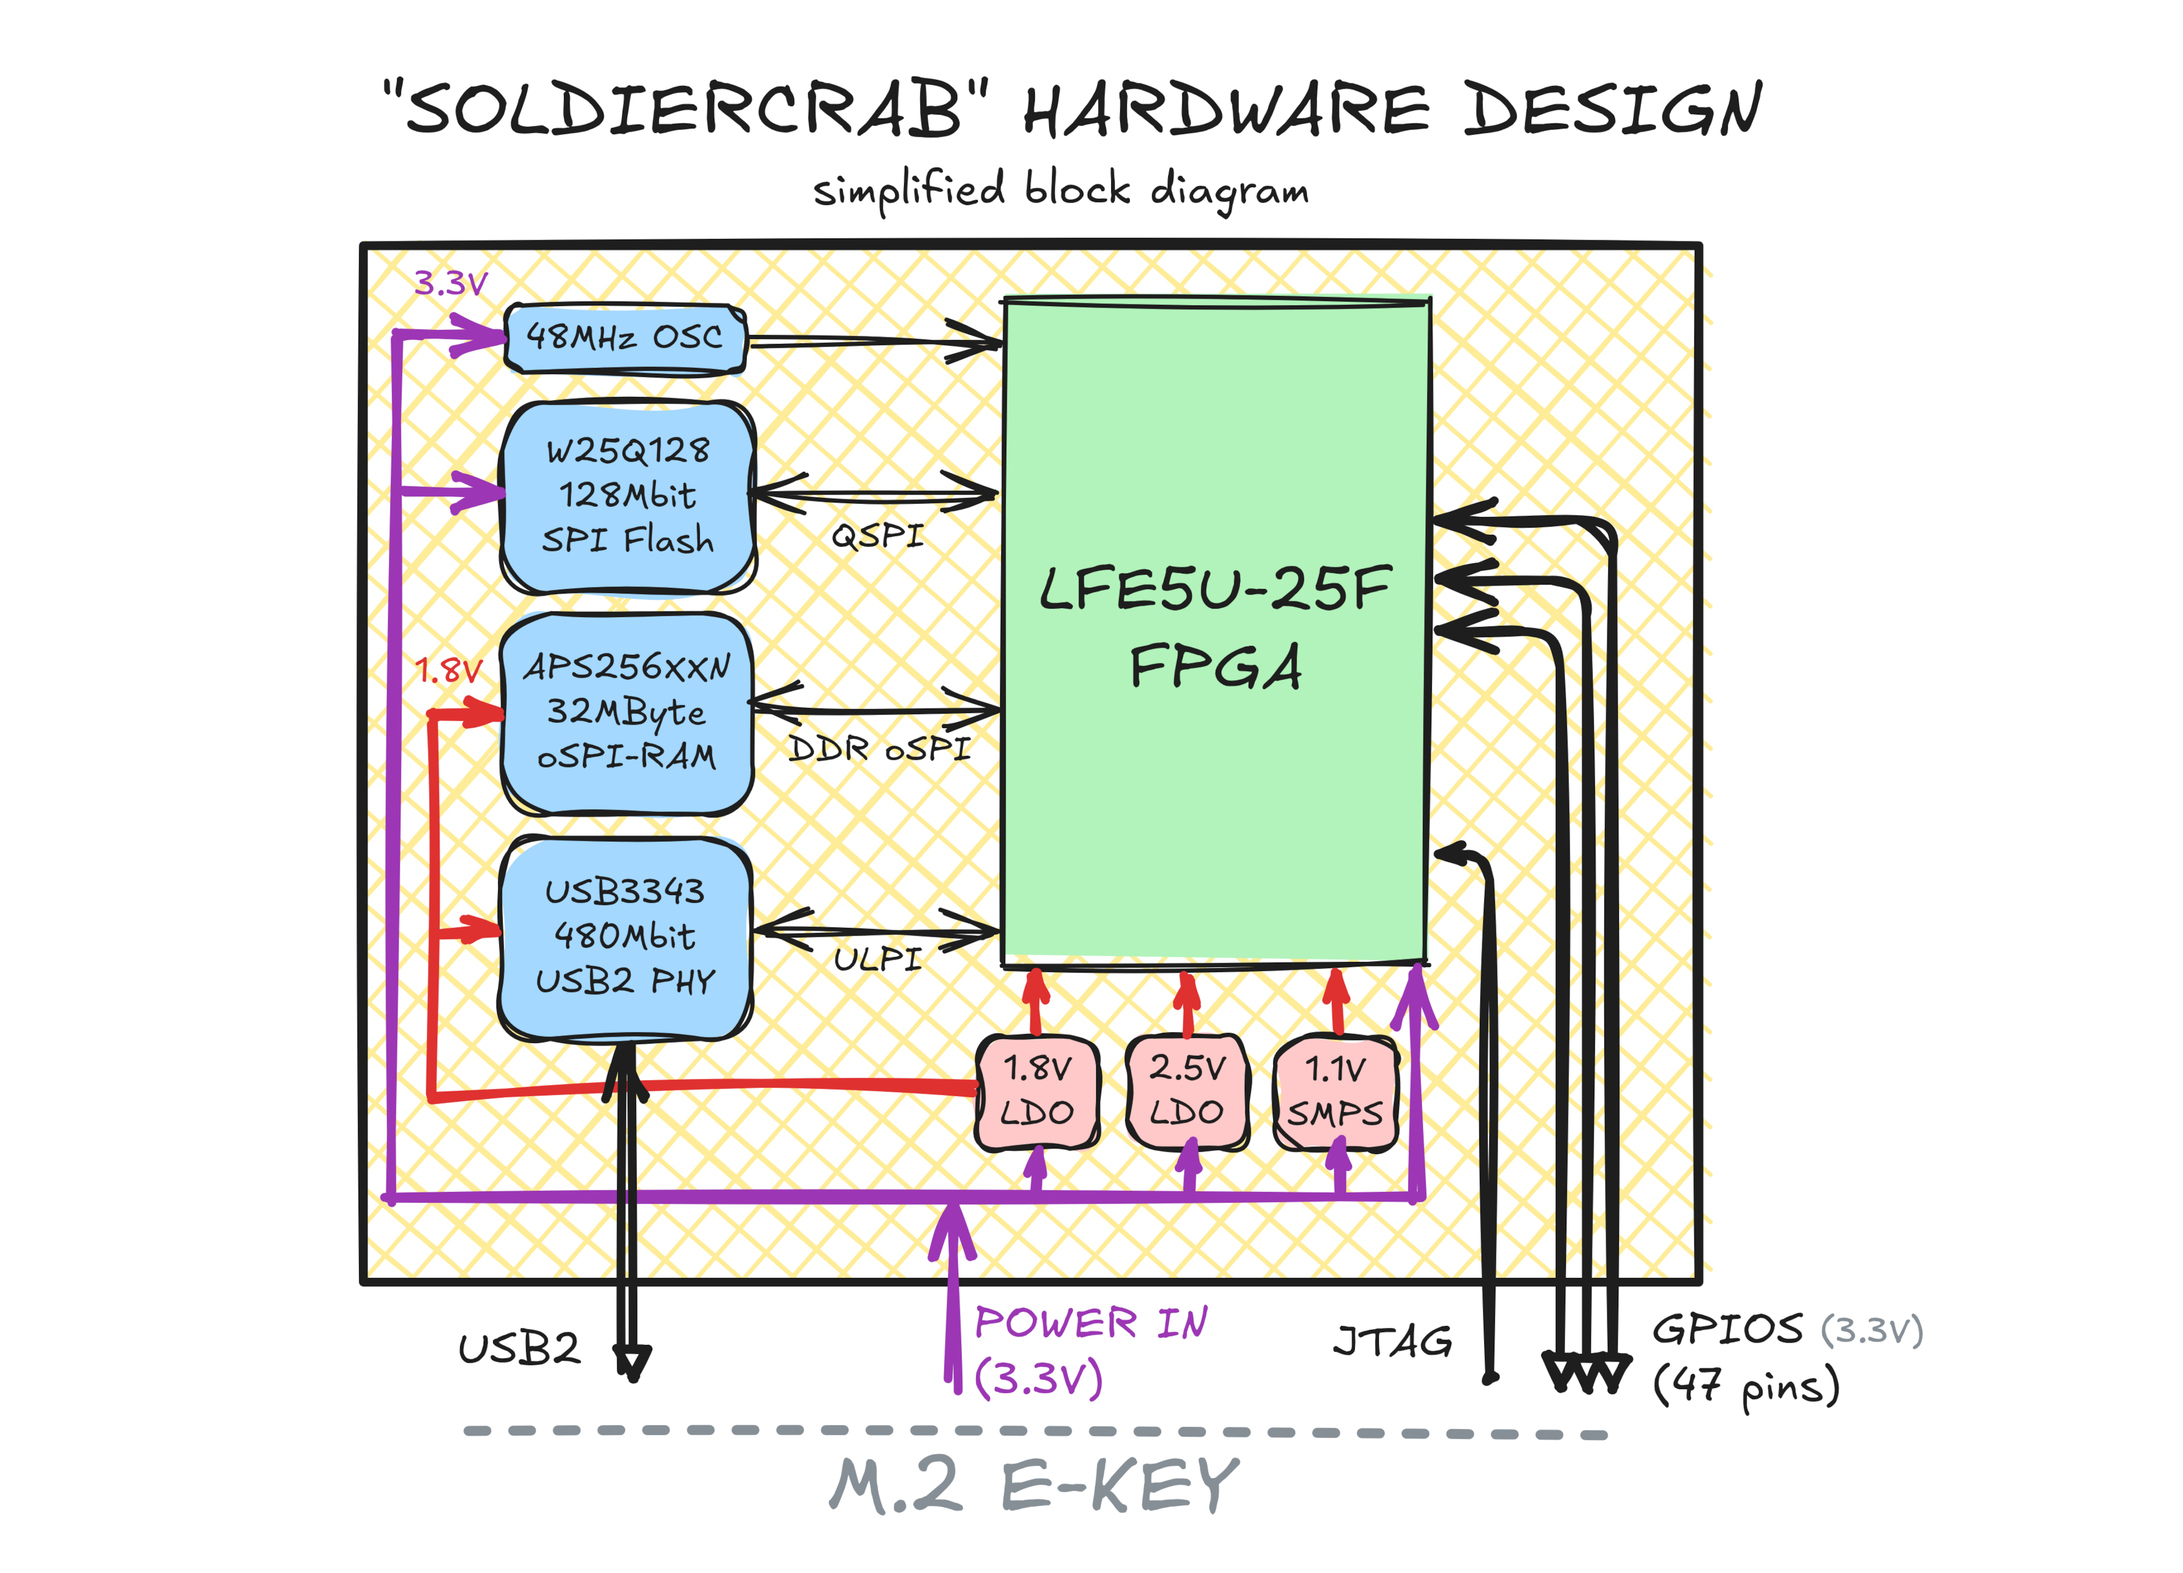
Soldiercrab only requires an M.2 socket, a 3.3V supply and JTAG connections in order to use it in your own design. And you could re-use much of Tiliqua’s RTL (memory controllers, USB audio code, SoC examples) in your own project, saving months of work.
Note
You may notice that TLQ-SOLDIERCRAB does not come with a heatsink, unlike the one that comes with TLQ-MODULE. The heatsink is not necessary, you can safely use TLQ-SOLDIERCRAB without it. Unless you are doing crazy things and overclocking the module, although that’s your own risk to take.
Factory Bitstream
Out of the box, TLQ-SOLDIERCRAB is NOT flashed with the Tiliqua bootloader. This is for good reason: if you were to design your own product, you definitely don’t want all the IOs to be actively driven, assuming your product is not using exactly the same pins as Tiliqua. That being said, every unit is tested inside a Tiliqua before shipping, to make sure every function of the board is working correctly, before the device is erased again.
Instead, TLQ-SOLDIERCRAB comes flashed with a simple LED breathing bitstream, which slowly pulses both LEDs on the board as soon as 3.3V is supplied to it. All other IOs are set to high-impedance with a weak pull-up to GND (this is the default IO state on unassigned IOs for ECP5).
Use with TLQ-MODULE
To use TLQ-SOLDIERCRAB inside a Tiliqua, assuming the rest of the Tiliqua is already correctly flashed (RP2040 on motherboard is flashed), you can follow this sequence:
Put the
TLQ-SOLDIERCRABin the M.2 slot on theTLQ-MODULEmotherboard and screw it down (not too tight!).Switch on the module. You should see the Soldiercrab LEDs blinking with the default factory bitstream.
Flash the Tiliqua bootloader to the bootloader slot using either tiliqua-webflash or our
pdm flash archivecommand-line tool provided with the repository.You should see the bootloader screen on the display output.
Use in your own project
For information on using TLQ-SOLDIERCRAB in your own project or designing it into your PCBAs, the best place to look is the soldiercrab README
Hardware Block Diagram
For deeper details (and schematics) of the hardware, see the soldiercrab README
Instructions for Safe Use
Take care whilst handling to avoid mechanical or electrical damage. When the product is powered on, do not touch the circuit board. When the product is not screwed down to a circuit board, only handle it unpowered and by the edges to minimize the risk of damage from electrostatic discharge.
Use with any hardware other than TLQ-MODULE, or at clock frequencies outside those supported by manufacturer-supplied TLQ-MODULE gateware is to be done at your own risk, in a controlled laboratory environment, with adherence to relevant regulations and standards applicable in the country of intended use.
To reach electromagnetic compatibility in a Eurorack system, the product shall be mounted inside TLQ-MODULE, securely tightened down with the single M.2 mounting screw. TLQ-MODULE should then be mounted securely in a fully enclosed housing made of conductive material (metal). Close all unused spaces with blind panels. Keep all cables, power or patch cables as short as possible.
The product is designed for reliable operation at normal ambient room temperature. Do not expose the module to water, moisture or bring the circuit boards in contact with any conductive materials.